For the fundamentals behind this workflow, start with Adobe Premiere Pro markers: the complete guide.
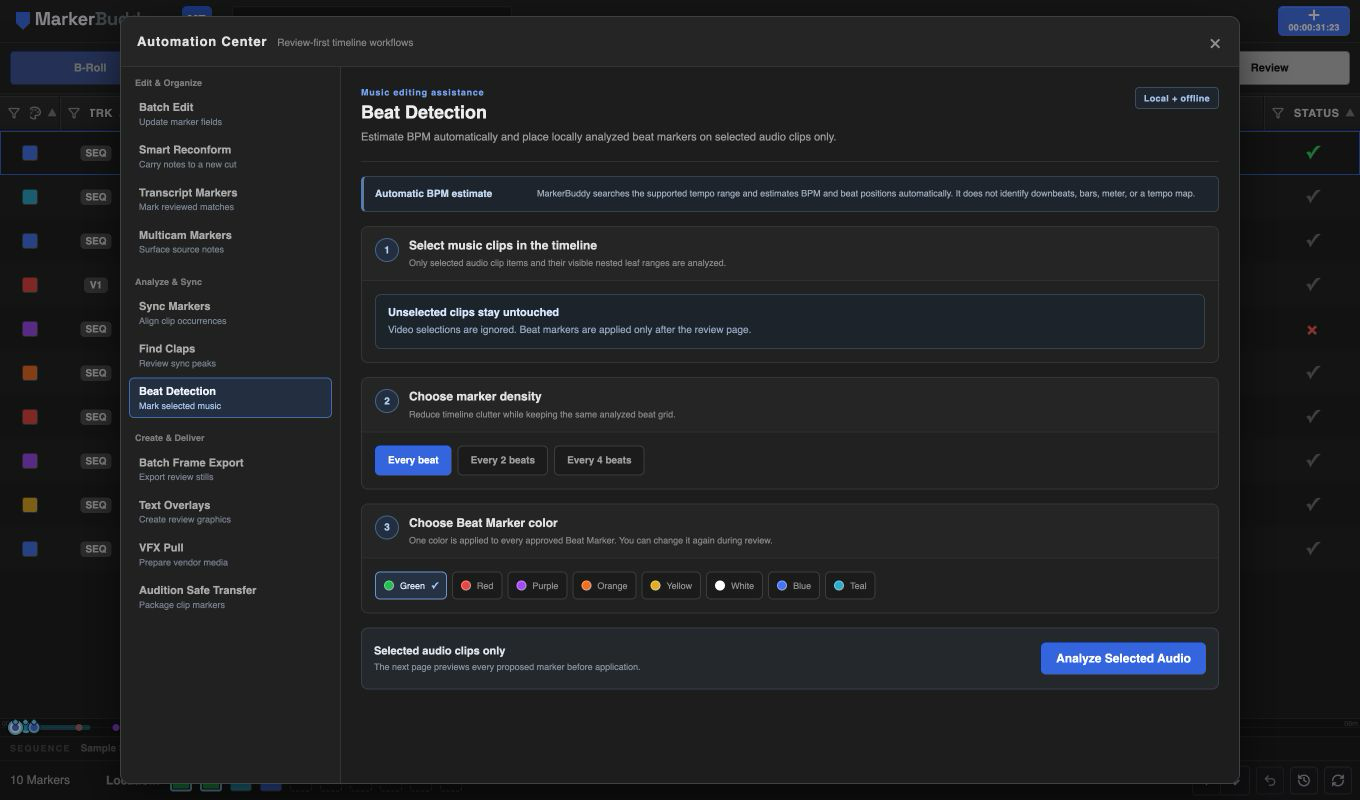
Analyze selected audio clips only
Select the intended music audio items in the active timeline. MarkerBuddy ignores video selections and every unselected audio clip. Visible selected ranges inside nested sequences are supported.
Approved markers are written to those selected source items. If the same source is reused elsewhere, its source markers can appear on other linked occurrences.
Choose marker density and color
MarkerBuddy finds BPM automatically across its complete supported range. There is no BPM search-range setting to configure.
Choose every beat, every second beat, or every fourth beat. Density changes how many proposed markers appear in review. Choose one of MarkerBuddy's eight marker colors in setup or review.
Review stability and every proposed marker
MarkerBuddy reports an estimated BPM and a 0-100 stability score for each source. Low-stability results stay visible but are not preselected, so noisy, speech-heavy, or weakly pulsed material cannot silently fill the source with markers.
The analysis estimates pulse positions only. It does not identify a musical downbeat, bar, meter, phrase, or tempo map. Review the music and clear any unwanted rows before adding point markers.
Every approved point marker is named Beat Marker and has an empty comment. The selected color is applied to the complete approved set.
Workflow
A practical four-step process
-
01
Select the intended music clips
Select only the audio clip items whose visible ranges should receive reviewed beat markers.
-
02
Choose density and color
Choose every beat, every second beat, or every fourth beat, and choose the Beat Marker color. MarkerBuddy searches for BPM automatically.
-
03
Analyze and review locally
Check each estimated BPM, stability score, and proposed pulse marker.
-
04
Add approved beat markers
Write only checked markers to the selected audio sources and review musical phrasing before cutting picture.
Before delivery
Review the pulse before editing
MarkerBuddy estimates recurring onset timing. It does not identify downbeats, bars, meter, phrases, or a tempo map. Syncopation, rubato, weak attacks, speech, and heavy compression can reduce stability, so low-stability rows remain unselected for review.
