For the fundamentals behind this workflow, start with Adobe Premiere Pro markers: the complete guide.
Location Memories use sequence markers
A Location Marker is a numbered shortcut to a Premiere sequence marker. Sequence markers can carry the assignment with the project, so another editor using MarkerBuddy can see it on another machine.
Start with the exact row you want to revisit. If several rows are selected, dragging still assigns the row you actually drag.
Assign by drag or right-click
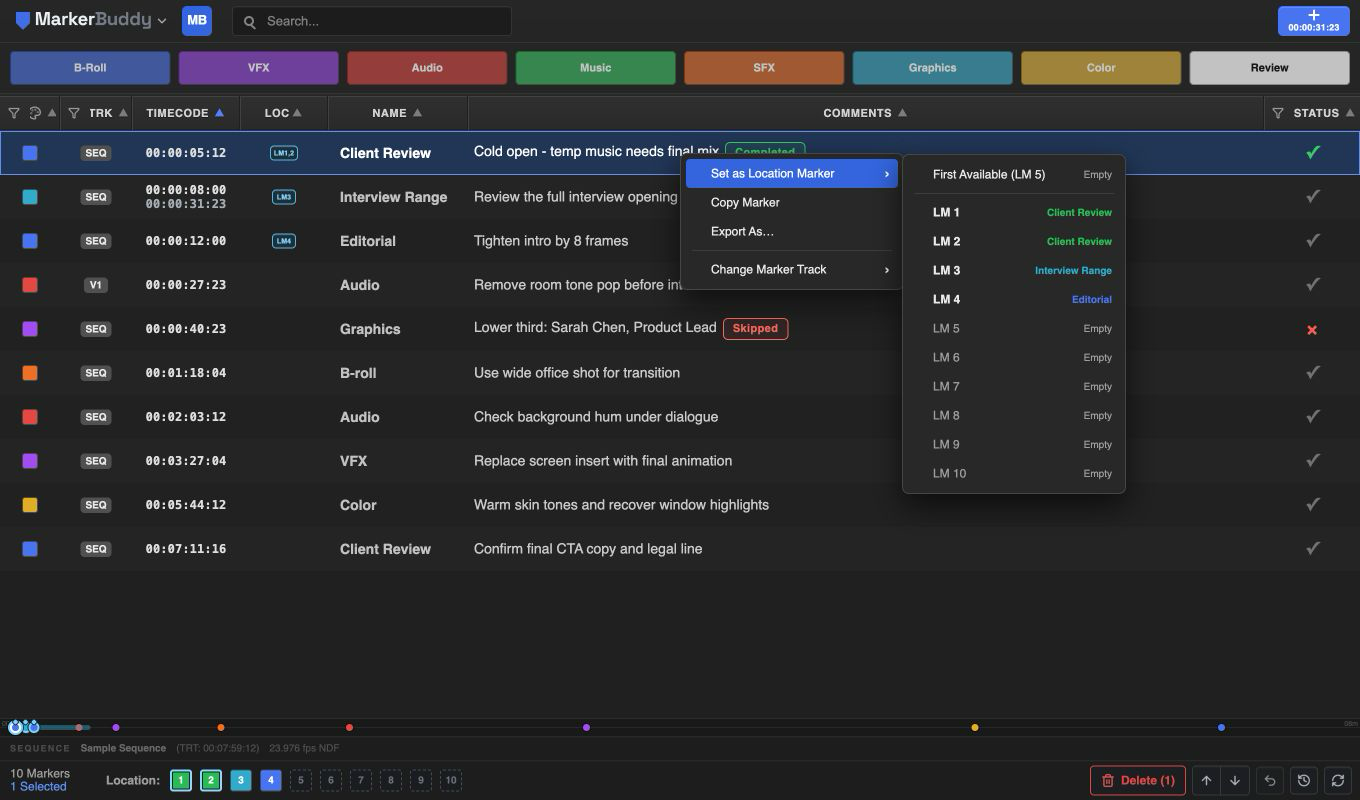
Use either method: drag the marker row onto LM1-LM10, or right-click the marker and choose Set as Location Marker. Choose First Available or an explicit slot. Assigning to an occupied slot replaces that assignment.
Each sequence has its own ten slots. Occupied controls use the marker color, and the same marker can be saved in more than one slot.
Confirm clip-marker conversion
If you start with a clip marker, MarkerBuddy shows Location Memories must be sequence markers. Choose Convert & Assign to replace it with a sequence marker at the same timeline position. The new sequence marker keeps the marker details that Premiere supports, and the original clip marker is removed rather than duplicated.
Choose Cancel to leave the clip marker unchanged and make no Location Memory assignment. Both drag-and-drop and Set as Location Marker use this same confirmation.
Recognize and jump to saved locations
Click an occupied control to move Premiere's playhead to the marker and make it the focused selection. The LOC column shows its assigned LM number, and the mini timeline labels the saved location with LM#.
The optional Stream Deck plugin includes Location Memory 1-10 actions. Assign the slot in MarkerBuddy first, then use the matching physical key to jump to it.
MarkerBuddy stores each assignment in the sequence marker's native comment data. Save and share the project normally; another editor using MarkerBuddy sees the assignment when the marker and comment are present. MarkerBuddy hides the compact record in its own comment editor and standard exports, but software that reads the unprocessed marker comment may display that record.
Location Memories created before 1.4.1 may be local-only. Reassign each older slot once in 1.4.1 to make it portable.
Workflow
A practical five-step process
-
01
Find the marker row
Locate the exact marker that you want to make instantly reachable.
-
02
Choose a numbered slot
Drag the row onto a slot, or use Set as Location Marker from the marker's right-click menu.
-
03
Convert if prompted
If the marker is on a clip, choose Convert & Assign or cancel without changing it.
-
04
Jump whenever needed
Click the slot or trigger the matching Location Memory Stream Deck action.
-
05
Manage the shortcut
Assign another sequence marker to replace it. Right-click the slot for Jump or Clear; Shift+F10 opens the same menu.
Safe recovery
MarkerBuddy refuses to guess
If MarkerBuddy cannot find one unique assigned marker, the slot shows a warning and does not jump. Reassign the intended sequence marker or clear the slot.
